With your base course installed, backfilled and compacted, you're ready to install subsequent courses.
VERSA-LOK's unique hole-to-slot pinning system allows Standard units to be installed on a variable bond; units do not need to be placed exactly halfway over the two lower-course units, or half-bond. The bond between vertical joints can vary in relation to other joints in the wall, but units should generally overlap by at least 4 inches to aid structural stability.
With other SRW systems, you often have to modify units to stay on half-bond, which can be extremely time-consuming. The flexibility to let the bond “float” throughout the wall allows for quicker, easier and safer installations.
Remember: Be sure to keep all vertical face joints tight when sliding units into place!
Setting the Pins
The secret to installing our Standard unit walls on a variable bond is our unique hole-to-slot pinning system.
VERSA-TUFF pins are inserted through the front holes of the upper course into the receiving slots in the lower course. There are four holes in each unit, but you only need two pins per unit. Use the outside holes (1 and 4) when possible, but if one of those outside holes is not usable, move the pin to an inside (2 or 3) hole. The two pins from the top unit should engage two separate units in the lower course. This gives the wall added stability in retaining your soil.
Before adding each course, sweep the tops of installed units to remove any debris. As you position each unit, slide it into place. This helps remove any imperfections from the surfaces of adjoining units and ensures a tight fit. Our pinning system provides a ¾-inch setback. After inserting pins, push/pull the units toward the front of the wall to remove any looseness in the pin interlocks.
 Important:
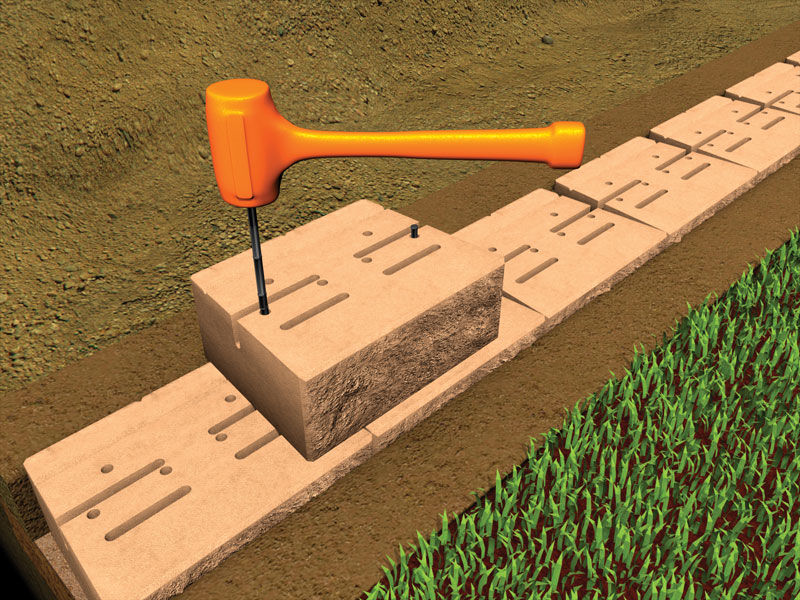
Make sure the pins are fully seated in the lower-unit receiving slots.
If necessary, use an extra pin and a mallet like a nail set to fully
seat pins. Pins are fully seated when they are recessed approximately 1
inch.
Important:
Make sure the pins are fully seated in the lower-unit receiving slots.
If necessary, use an extra pin and a mallet like a nail set to fully
seat pins. Pins are fully seated when they are recessed approximately 1
inch.
When pins are set in the first unit, follow the same pattern down the entire wall. Install no more than two courses of panels (20 inches) before backfilling and compacting behind your wall.
Before adding each course, sweep the tops of installed units to remove any debris. As you position each Standard unit, slide it into place. This helps remove any imperfections from the surfaces of adjoining units and ensures a tight fit.
 Remember: Be sure to keep all vertical face joints tight when sliding units into place!
Our pinning system provides a ¾-inch setback. After inserting pins, push/pull the units toward the front of the wall to remove any looseness in the pin interlocks.
 Important:
Make sure the pins are fully seated in the lower-unit receiving slots.
If necessary, use an extra pin and a mallet like a nail set to fully
seat pins. Pins are fully seated when they are recessed approximately 1
inch.
Important:
Make sure the pins are fully seated in the lower-unit receiving slots.
If necessary, use an extra pin and a mallet like a nail set to fully
seat pins. Pins are fully seated when they are recessed approximately 1
inch.
When pins are set in the first unit, follow the same pattern down the entire wall. You can stack as many as three courses before backfilling and compacting behind your wall.
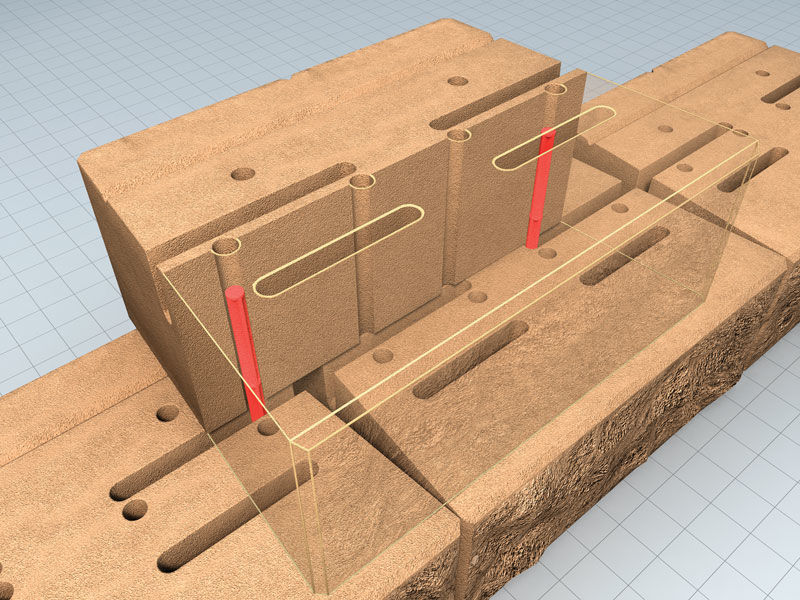
Pinning Detail
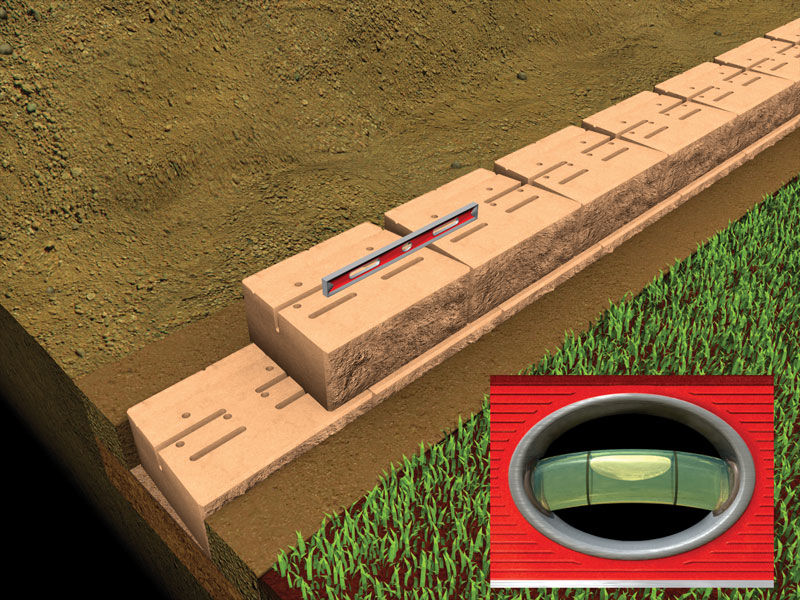
Level Each Course